Home |
Community |
Forms |
Pictures |
Procedures |
- - - - - - -
- |
- - - - - - -
- |
| Mark's KLR650 Site Has Moved! *** This is old and outdated Information *** Please click the following link and change your bookmark to: ---------------------------------
|
| RAIN T-MOD / CARB
VENTING |
Required for installation: 8 and 10mm socket Philips head screwdrivers |
A complete kit for this is available from Arrowhead
Motorsports |
NOTE: Information regarding installation |
NOTE: “Left” and “right” are described from the saddle position of the motorcycle. |
CAUTION: Failure to follow installations can result in damage to motorcycle or accessories. |
WARNING: Failure to follow installations could result in injury or death to operator and/or passenger or others. |
| 1. Place motorcycle on solid, level ground on centerstand if so equipped. |
| 2. Remove the right and left side covers, seat, gas tank and vent lines, “mark the vent line for reassembly.” |
| 3. On the top left side of the carburetor you will find the carburetor vent line, it’s next to the choke cable. See image below: |
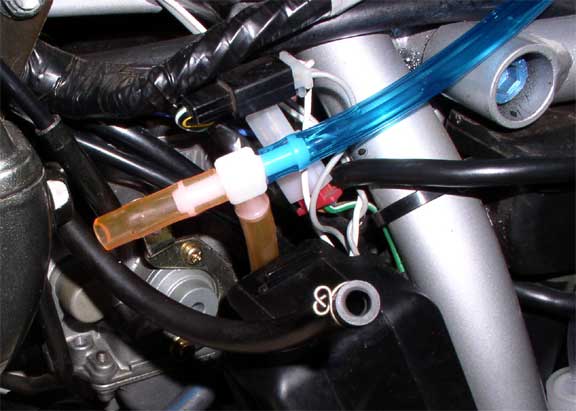 |
| 4. Slide the vent line off the connector and make a cut about 1 ½" from the end. |
| 5. Push that 1 ½" end onto the end of the T fitting, and the remaining vent line onto the T fitting end so it is pointing down. |
| 6. Run the new vent line up under the gas tank mount off to the left side on the frame and along the top of the air box. See image below: |
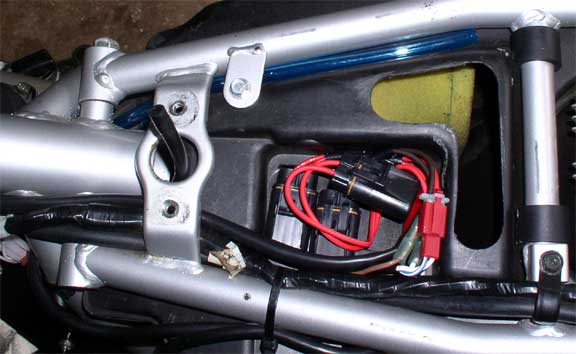 |
| 7. Replace the right and left side covers, seat, gas tank and vent lines. |
| Thanks for this procedure: |