Home |
Community |
Forms |
Pictures |
Procedures |
- - - - - - -
- |
- - - - - - -
- |
Mark's KLR650 Site Has Moved! *** This is old and outdated Information *** Please click the following link and change your bookmark to: ---------------------------------
|
| SUPERBRACE INSTALLATION |
Installation of the SuperBrace isn't difficult,
but there is one "gotcha," which is the lower ends of the
fork boots. The SuperBrace uses the space where the boot bottoms normally
clamp, but there is a fix for this... |
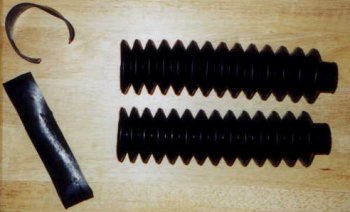
The SuperBrace and Daystar
boots came from Fred Hink's Arrowhead Motorsports at: https://www.angelfire.com/ut/moab/index.html |
The
picture above shows the Daystar boots that Fred sells for the KLR650.
I was going to use the OEM boots, but I didn't care for the look of
the brownish OEM boots into the black brace. Note the wide band at the
bottom (left) of the boots, normally used to zip-tie the boots to the
fork tube. I assume this procedure would work just as well for the OEM
boots, but have not tried it. |
| |
 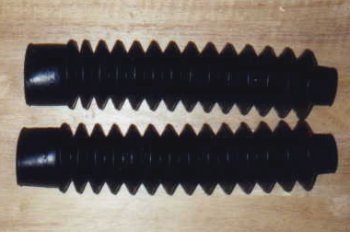 |
The
above pictures shows the same boots with the band cut off right where
it ended under the first "bellows" of the boot. |
| |
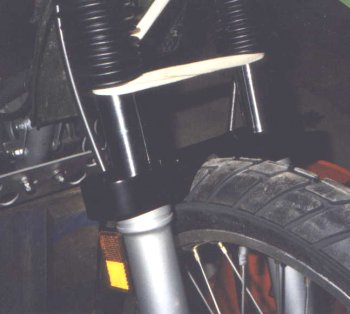 |
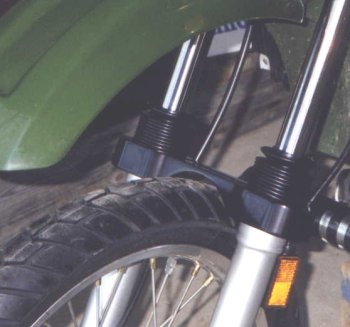
The
picture above shows the SuperBrace on the bike. Install the SuperBrace
with the bolts to the rear, and the "SuperBrace" text facing
forward. Position the brace so the actual clamping area is flush with
the lip/edge of the lower fork tube top. This shows in the next photo,
below. Hold the boots out of the way with clothesline, or whatever.
Use some blue Loctite on the bolts, then tighten to the recommended
torque. |
| |
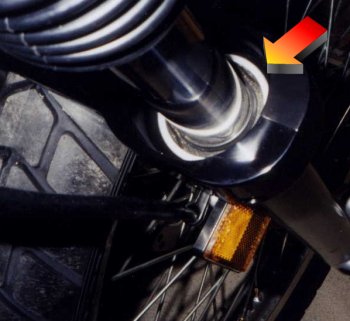 |
The
arrow in the above picture not only shows that the bottom of the SuperBrace
well is mounted flush with the top of the lower fork tube, but also
where to apply silicone. IMPORTANT NOTE: There are two holes in each boot, about in
the middle. Before the boots are set into the silicone, make sure these
holes are facing BACK, toward the gas tank. I
got one of the smaller tubes of GE Silicone II, taped a flex straw to
the tip, and ran a bead of silicone all around the inside "corner"
of the brace well. Be sure to keep it well away from the fork seal,
and don't apply too much or it could be squeezed into the fork seal
area. |
| |
 |
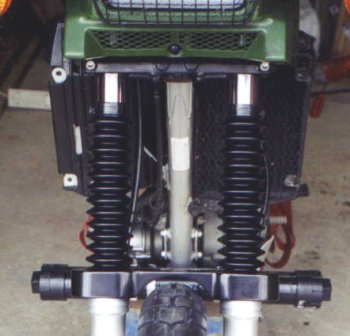
The
above picture shows the next to last step. Work the bottom few boot
"bellows" down into the well, applying even pressure to be
sure the rubber is well seated into the well & silicone. Once you've
done this, move the whole boot down, as shown, and clamp into place
until the silicone is thoroughly dry. |
| |
 |
The
picture above shows the completed installation. |