Home |
Community |
Forms |
Pictures |
Procedures |
- - - - - - -
- |
- - - - - - -
- |
| Mark's KLR650 Site Has Moved! *** This is old and outdated Information *** Please click the following link and change your bookmark to: ---------------------------------
|
| BIG CEE SHARK FIN
INSTALLATION |
| The Big Cee Shark Fin is a well machined rotor protector that is a must-have for people who do any amount of trail riding, and a should-have for everybody. Compare the price of a rotor to that of the inexpensive Shark Fin and you'll see what I mean.
|
| Dr. Chris Krok of Big Cee Engineering, creator of the one and only KLR FAQ, has done an extraordinary job of designing and fabricating the Shark Fin. It bolted up perfectly, and is solidly installed using his mounting instructions.
|
| Chris provides excellent
instructions, and a diagram with the Shark Fin. This is just an
expansion of that information, mostly to provide the following
pictures. Each picture will be ABOVE it's accompanying
text. |
| |
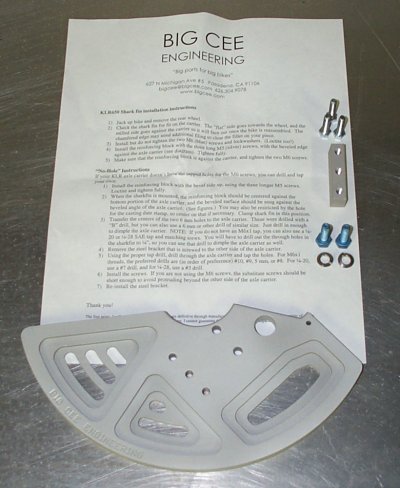 |
| The
picture above shows what you'll get with your order of a Shark
Fin. There are written instructions on one side of the document,
(shown), and a diagram on the other. The fasteners were in a sealed
envelope, and the fin was wrapped in protective paper. It arrived
in a padded mailing bag. |
| |
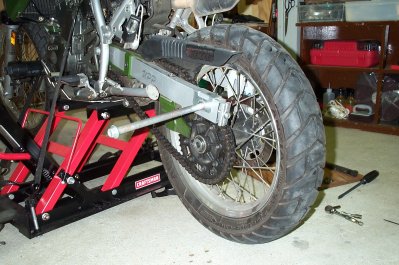 |
| The
picture above shows the rear wheel in the process of being removed.
I like to loosen the axle nut with the bike on the ground, and
then jack it up. (That's
my Sears Craftsman Bike / ATV lift that I got on sale through
the Craftsman Club for $89.00!) Nothing
special here, just loosen the axle nut, loosen the adjusting nuts
on the swingarm ends, push the wheel forward as far as you can,
pull out the axle bolt and lower the wheel to the ground, take
the chain off the sprocket and take out the wheel. |
| |
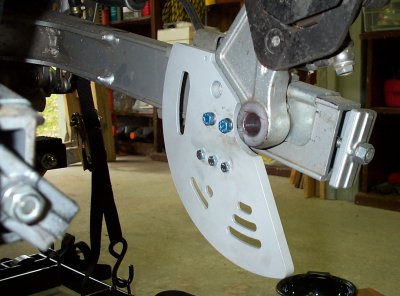 |
| The
picture above shows the inside of the Shark Fin, which is mounted
on the swingarm. The flat side of the fin faces the rotor, the
milled side faces out. Perinstructions, install but don't tighten
down the two blue bolts. Don't forget the lockwashers, and be
sure to use a locking agent, such as Loctite. |
| |
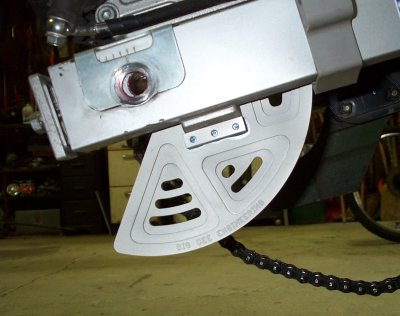 |
| The
picture above shows the outside of the Shark Fin. The block, included
with the kit, has a flat side and a beveled side. Looking forward
from the rear of the bike, the flat side of the block is
down, and the thickest / widest part is facing
out. (See the picture below.) |
| |
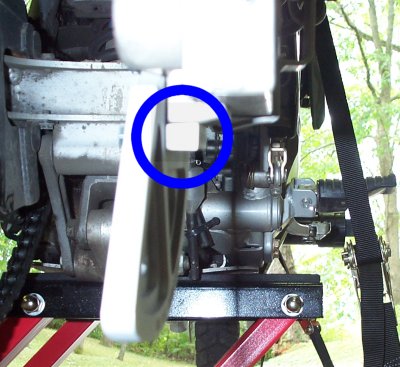 |
| In the picture above, I'm trying to show the bevel and direction of the reinforcing block. When it's correctly installed, there is no gap or space between it and the axle carrier on the swingarm. When you're sure of how the block should go on, apply Loctite to the three silver bolts, and fully tighten them down. Make sure that the reinforcing block is snug against the axle carrier, and, remembering the lock washers and Loctite, tighten down the two blue screws. The Shark fin is installed! Before you re-install the wheel, now would be a good time get some grease into the rear wheel bearings, and maybe even (Shudder), clean things up back there. The procedure for re-installing the wheel is simply the reverse of removing it, but be absolutely sure you haven't left off or knocked off the rear wheel spacers - make sure that all the parts that came off, are going back on! When you re-install and adjust your chain, remember that it shouldn't be too tight. You can use the string alignment procedure or whatever method works best for you. Be sure to sit on the bike, and reach down to test the tightness of the chain. A loose chain without weight on the saddle can become as tight as a piano wire with someone seated on the bike. |
| |
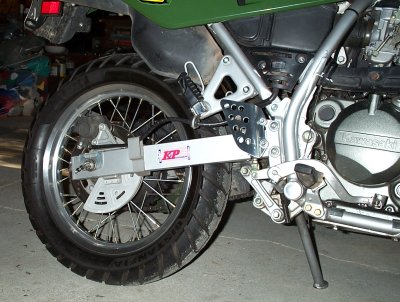 |
| The picture above shows the "finished product." It was a completely painless job, due in large part to the precision machining. I guess from wheel off to wheel back on, it took about 40 minutes, and about 15 of that was looking for my glasses, without which I couldn't tell the beveled side of the block from the flat side... (Yup, it IS tough getting old!) Just for the record, the rear tire isn't showing enormous chicken strips. I took my own suggestion and cleaned up the rim and rubber. The dirt is from rolling the bike around in the garage, not road use. (Grin) |