Home |
Community |
Forms |
Pictures |
Procedures |
- - - - - - -
- |
- - - - - - -
- |
| Mark's KLR650 Site Has Moved! *** This is old and outdated Information *** Please click the following link and change your bookmark to: -------------------------------- |
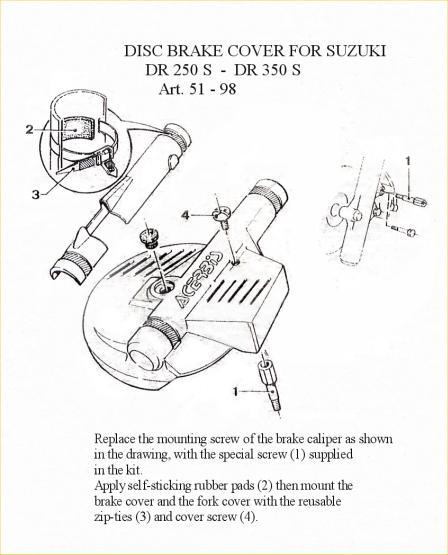
ACERBIS (SUZUKI) FRONT
DISK PROTECTOR FOR THE KLR |
| The credit for this procedure goes entirely to MarkB - A3, A9. In respect for his work, the content was pasted in exactly as received... |
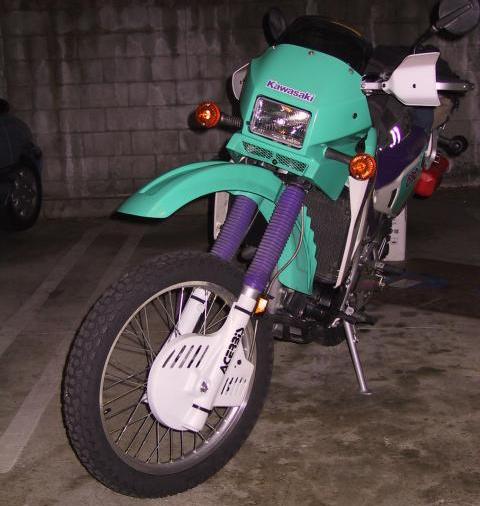
| I had seen other MX bikes, dualsport bikes, KLRs with the nifty disc and fork protectors and went to get some for my '95 Barbie Bike, only to find that Acerbis had discontinued the guards for the KLR650. Used sets came and went on ebay but usually at a substantial premium. I wanted these to protect the front brake rotor and the fork sliders. If you never crash, then you have nothing to worry about. Unfortunately, I have to worry about these things. |
| After much hand wringing, I began looking for an alternative. I compared the disc/fork guards for several other bikes and found that the unit for the Suzuki DR350 was very close in size for the disk as well as the fork diameters. I matched them up on a KLR at a local bike shop and decided that for the $32 it would be a good experiment. Other recommended the disk guards from the KLR600 as an option, nice, but these are discontinued too. They do come up on ebay at times, but even used, they pull 50 bucks. |
| A few notes: The kit for the DR350 actually works well. The fit over the brake disc is very close, leaving about 1/4inch all around. Other areas like the axle bolt or the caliper section can fit with more tolerance for adjustment. But the cover must clear the brake disc all around. If the disc cover drags or rubs against the brake disc, it will eventually cut through the plastic guard, possibly interfering with the front brake. |
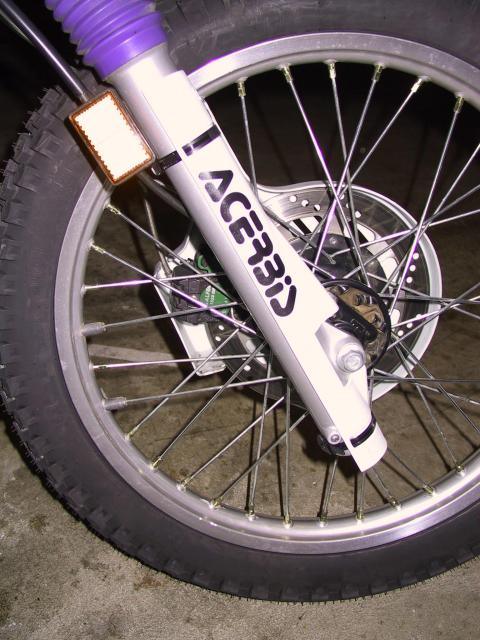
| 1. Review the basic instruction provided by Acerbis. The kit contains an extended bolt to pre-place one of caliper mount bolts. This bolt can take a screw to act as a mount for the disc cover. I decided to ignore this part as I did not want the extended caliper mount bolt getting sheared off in a crash. The right side fork cover fits well right out of the box. It was just a little long on the lower end, maybe a half-inch too long. I opted not to trim the excess at the bottom of the cover. |
 |
| 2. Place the disc cover into position and check for clearance and overall fit. Take several test fits, and use a helper or masking tape to hold the pieces in position. The important thing is to clear the brake disc; top, sides, and bottom. Remember, the brake disc should NOT touch the disc cover. |
 |
| 3. While in position use a wood or plastic mallet to tap on the outside of the cover; especially over the axle bolt area and the caliper bosses. Use this technique to mark the inside of the cover -show you where to start the cutout for the bolt. First, drill a small 1/8inch pilot and make a few more test fits. Then move on to enlarging the hole to clear the axle bolt & nut. Check the disk to see that it does NOT drag on the cover - usually top and bottom are critical, but also the rear most area. I decided not to use the axle nut to hold on the disc cover. |
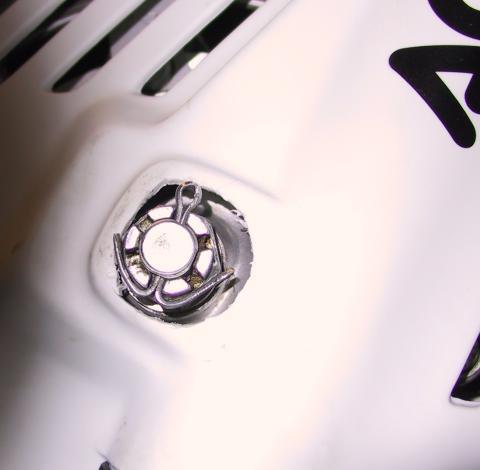 |
| 4. Also tap the cover directly over the shoulder on the caliper to locate this point for a second cutout. Drill the pilot, and check for fitting before enlarging. The clearance holes here came out too large. With care, yours will be much cleaner. Also, I made a little extra clearance for the other shoulder on the caliper but it wasn't needed. While it looks a bit rough, it is after all a dual-sport so a little snafu like this aint no big thing. |
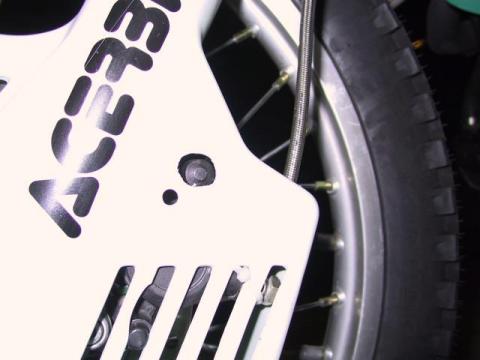 |
| 5. The brake line will need a hole. I first drilled the 3/8inch hole in position for the brake lin to pass through, then using a hand saw, I cut a slot leading into the hole, like a keyhole. Also, if your brake line is the stock rubber unit, you will need to protect it from cuts or abrasion from the edges of the disc cover. Use a rubber grommet or fit a rubber sleeve cut from fuel line and attach with zip ties above and below where it passes through the cover. |
 |
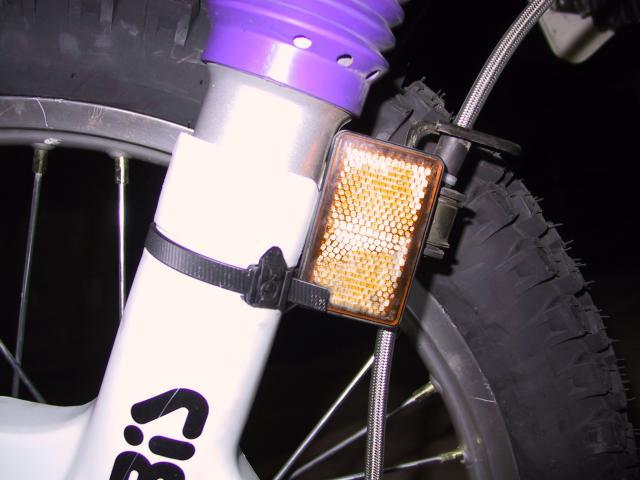
| 6. The very top of the disc/fork cover had to be trimmed to fit under the amber side reflector. A couple of passes with the utility knife it was a near perfect fit. Both the fork cover and disc cover mount with re-usable zip-ties. These are pretty neat, not sure how sturdy they are, or how they work in the cold. I should re-arrange them so they all facing backward to prevent them from catching on brush or trail stuff. The covers have a little foam pad on the inside to prevent rubbing or squeaking. The padding prevents the plastic from chaffing directly against the alloy fork sliders. If you need a little more padding, it’s easy and cheap to fit some self stick weather-stripping from the hardware store. |
 |
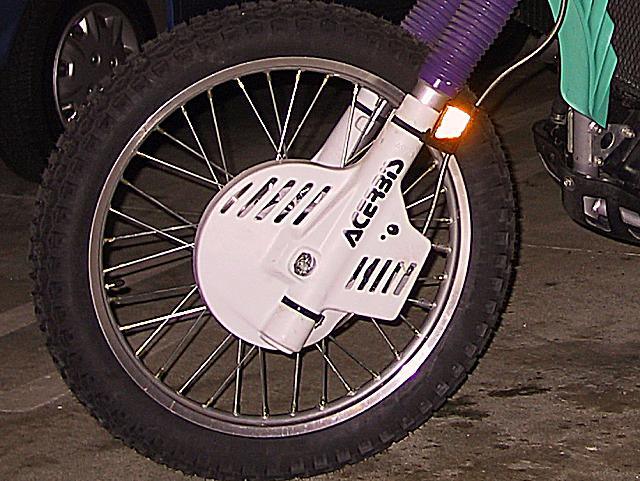
| 7. A fine addition to the bike -looks almost MX tuff and should reduce the amount of casual damage from crashing and thrown up rocks, for both the forks and the front disc. I had posted on the net sometime back, looking for disc/fork covers and got no response other than "Acerbis quit making them". I have been scheming ever since. Luckily the DR350 disc and forks are about the same size. For final testing after mounting, I found the disc cover was dragging a bit on lower, rear-most section. So, I just trimmed it back with the utility knife. The big feature is that it protects the rotor from rock and other impacts, so a small gap in the coverage on the rear of the rotor is of little concern. |
 |
 |