Home |
Community |
Forms |
Pictures |
Procedures |
- - - - - - -
- |
- - - - - - -
- |
| Mark's KLR650 Site Has Moved! *** This is old and outdated Information *** Please click the following link and change your bookmark to: ---------------------------------
|
DSR ACCESSORY
FUSE KIT |
|
Thanks to Tammy of Dual Sport Riders for an exceptionally well made, and easy to install kit. Whether you're experienced with electrical work or not, this kit makes life good! |
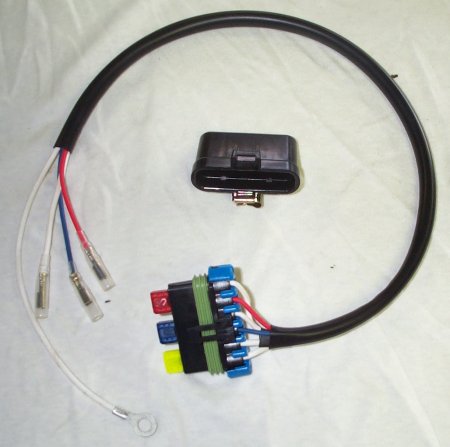 |
The above picture shows the kit. Fuses are included, and you can buy the tiny blade-type fuses just about everywhere. Also included are male bullet connectors for your accessories. *I* chose 10amp, 15amp and 20amp, I don't recall what sizes came in the kit. NOTE the shiny clip on the cover in the middle of the wire loop. I'm using the 15amp line for my upgraded 2-horn Fiamm setup, and the 10amp for the 12v outlet. The 20amp is unused at this point. |
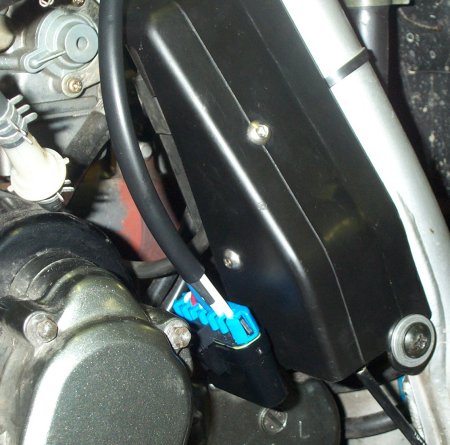 |
The clip, noted above, is used to secure the fuse block to the lowest part of the kickstand switch cover. This protects it from the oncoming elements during a ride, and from being knocked around. The clip has barbs on it. Once it's on, it will stay there unless you use a small, flat bladed screwdriver to slip behind the clip and ease it off the cover. The two allenhead bolts that you see in the cover are from the Fuse Relocation Kit. |
 |
|
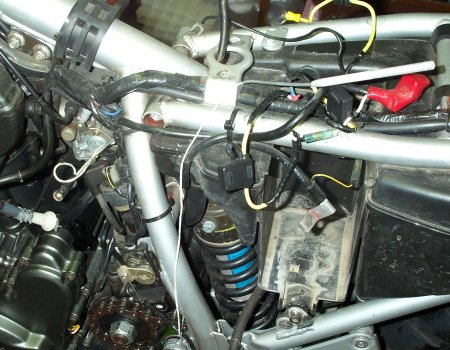
It was easy enough to run the wires up to the area above the battery, but I wanted to use a route that I just couldn't manage without a helper string to guide the wires. I put the string down through from the top using a flexible aluminum retrieval magnet, taped the wires to the string, and pulled the whole thing up and through. The longer white wire with the ring connector goes to the battery positive (+) terminal. The remaining three wires are power wires for your accessories. Use Dielectric (silicone) grease on the connections. |
 |
The
picture above shows BOTH the Fuse
Relocation Kit and the Accessory Kit. I've got a
neat little bundle of wires, and won't ever again have to deal
with the hassle of removing the side covers and saddle just to
replace a fuse. Plus, with the Fuse Accessory Kit, I've got a
super easy way to add in more devices. |