|
SWINGARM
MAINTENANCE |
|
I
was doing other maintenance, and already had the wheel
off. Up until the time when the wheel is actually removed
and out of the way in this procedure, some of the text
will be saying one thing, while the picture kind of shows
another. The pictures are relevant, so have been included. |
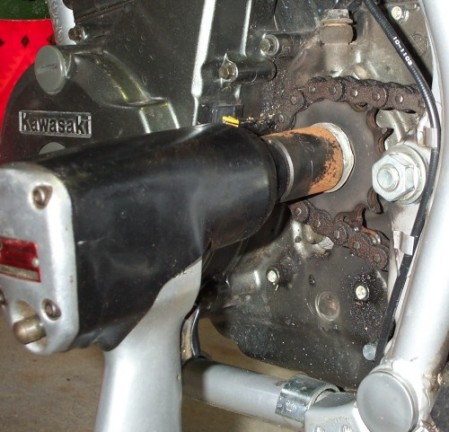
If
you're going to remove the front countershaft sprocket
to replace it, or for whatever other reason, it would
be best to loosen the countershaft nut before proceeding
any further. This will make life easier later on.
It
is not necessary to remove the countershaft
sprocket if all you plan to do is lube the swing arm.
|
|
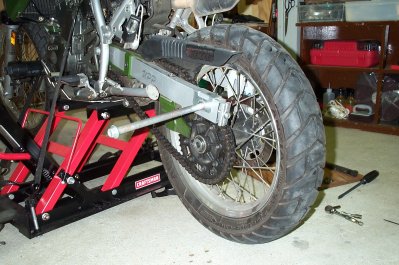
Lift
the bike so the rear wheel is off the ground. You'll have
to use a lift, or crate. Something like my Easy-Lift
won't work because you'll be removing the swingarm. |
|
|
The
order in which you do this, wheel or caliper doesn't really
much matter, but I prefer to remove the caliper first.
As shown above, remove the brake line holder. |
|
|
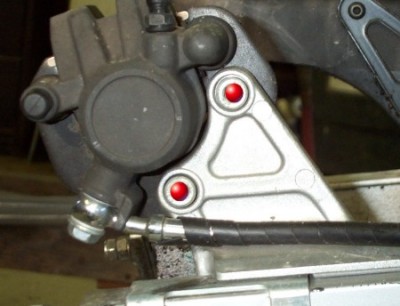
Next,
remove the caliper itself by taking out the mounting bolts,
shown in the picture above, marked by red dots. I suggest
removing the bottom bolt first, and then holding the caliper
as the top bolt is removed. |
|
|
Hang
the caliper out of the way, or place it on something like
a 5 gallon pail - don't allow it to just
hang by the brake line. |
|
|
The
picture above is from the Sharkfin
procedure, but shows the place where you should be now,
if you're following along with my text.
To
avoid re-adjusting your chain, loosen the axle nut,
and remove the axle. Slide the wheel forward until you
can take the chain off the rear sprocket. Then, remove
the wheel.
Oonce
you have the axle bolt removed, I would suggest a light
coat of grease to protect it, and make subsequent installation
and removal easier.
|
|
|
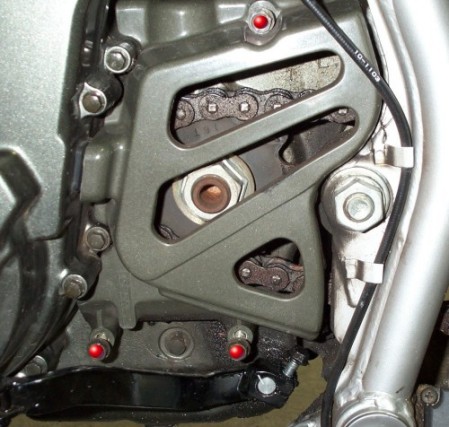
Next,
remove the engine sprocket cover. The position of the
three bolts to be removed are marked by the red dots.
|
|
|
NOTE:
It is NOT necessary to remove the countershaft sprocket
if you have no other reason for doing so.
Remove
the countershaft nut. Once the nut is off, you'll be
able to easily remove the sprocket and chain from the
shaft because the rear wheel is off. Put the nut, lock
washer and sprocket aside. The chain will eventually
be removed along with the swingarm.
|
|
|
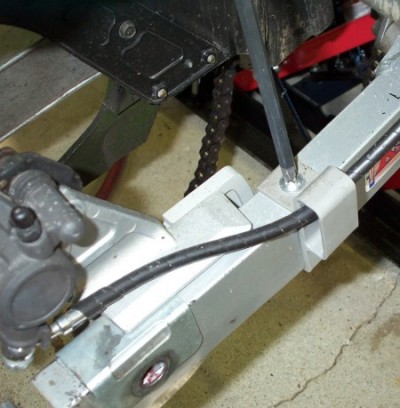
Shown
in the picture above is a hose holder fastened to the
upper right corner of the swingarm. You can just loosen
this and take the hoses out, slip the hoses out without
loosening at all, or remove the bolt and holder all together.
It's easiest to just take the hoses out. |
|
|
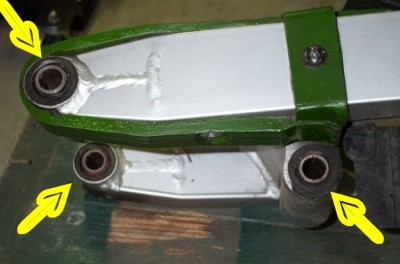
The
picture above shows the two links that will have to
be removed. (These are the pieces you'd replace if you
wanted to lower your bike.)
Order
doesn't really matter, but I remove the top bolt, and
then the bottom. Both are removed to gain access to
the swingarm and bearings (upper) and bearings (lower).
|
|
|
Next
is to remove the main mounting bolt. This one can be
troublesome if you've neglected to perform this service.
There are a multitude of options; some people just whack
the bolt end with a mallet, or, as I suggest trying,
with the nut removed, put an impact socket on the bolt
head and let it hammer away until the
bolt breaks free of the corrosion.
Additionally,
some people feel that the upper engine mounting bracket
should be removed to facilitate removal and/or installation
of this bolt. I've never done that, and have never had
any trouble whatsoever with the bolt. I believe this
is very unlikely, but if you simply can't get the bolt
back in, try loosening that upper engine bracket.
|
|
|
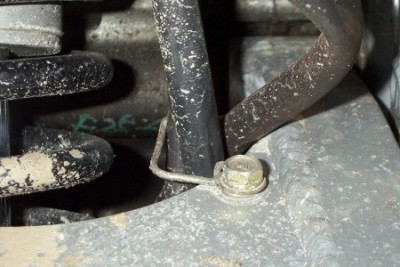
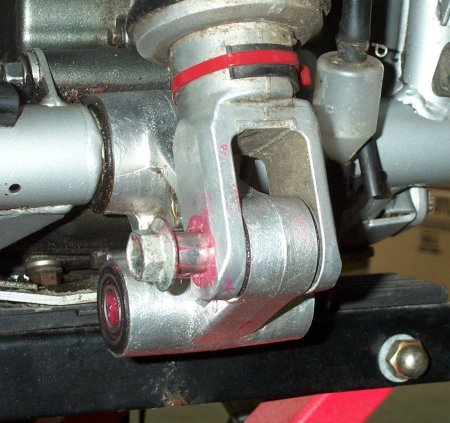
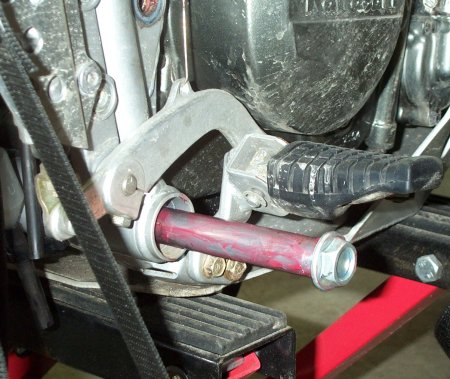
WARNING!
Be careful as you remove this swingarm mounting bolt.
As you can see in the picture above, as the bolt is removed
it can push against the brake pedal spring. It's possible
that no damage would occur, and that the spring would
just slide off the bolt head, but why take the chance!?
Just move it to the side, and out of the way. |
|
This
mounting bolt is the final thing holding the swingarm
in place. I sit behind the bike, with the swingarm on
my knees. I reach over and pull out the mounting bolt,
enabling me to "catch" the swingarm as it comes
away from the bike. It isn't at all heavy. |
|
With
the swingarm free of the bike, you can now remove the
swingarm and chain together. Now is a good time to drop
the chain into a bucket of WD40, kerosene or whatever
you want to use to clean it. Doing it now gives it time
to soak while you're taking care of the bearings. |
|
|
|
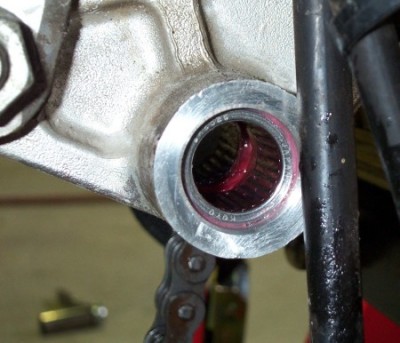
There
are four areas where the bearings are to be found, as
shown in the two pictures above. They are the two ends
of the swingarm, and in the middle underneath where the
top of the links connected. The fourth is part of the
shock mount, and where the bottom of the links connected. |
|
|
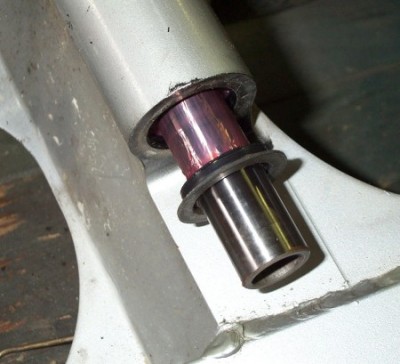
The
rubber seals are not difficult to remove, but care should
be taken to not damage them.
NOTE:
The shaft can be removed before the seals, this makes
getting the seals out easier. You can slip a thin blade
between the seal and the housing and rock it back and
forth slightly to loosen the seal. Alternatively, you
can put a screwdriver up into the seal from the outside,
and gently pop it out that way.
|
|
|
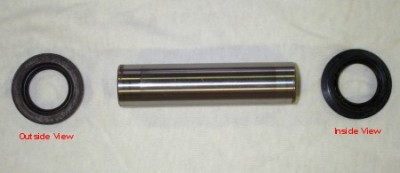
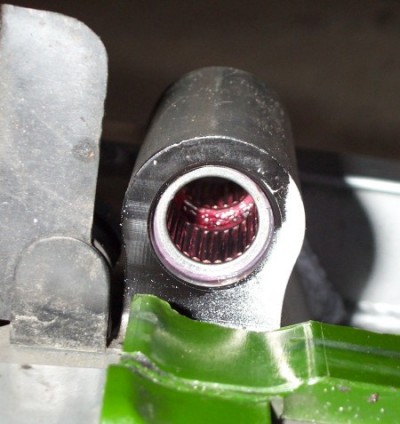
The
picture above shows the shaft and seals. All bearing locations
have this arrangement, but the shafts are shorter on the
two swingarm ends. |
|
|
Above
is a closeup of what you'll find. This is the middle,
underside of the swingarm, and there is a pair of needle
bearings in the housing. The bottom link / shock mount
housing has the same setup. The end of the swingarm has
just one bearing each. |
|
|
Remove
the bolt at the bottom of the shock. You can do this without
fear; the preload / spring tension is kept within the
confines of the upper and lower keeper plates, and won't
cause trouble now, or when it's time to reinstall. |
|
|
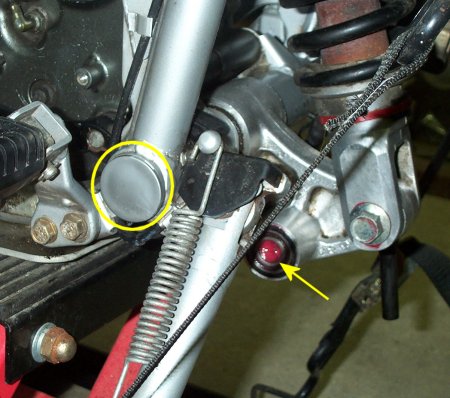
Remove
the gray caps on either side of the bike, (circled), and
then remove the bolt. I had to use a very long screwdriver
to tap the bolt all the way through. |
|
|
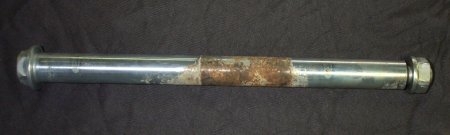
This
is what I found when the bolt was removed. It came out
alright now, but in another couple years I bet it would
have caused some real trouble. I cleaned it up, and greased
it before reinstalling. |
|
|
I
pumped the ends full of grease, and then reinstalled the
bolt - catching the grease at the other end as it was
pushed through. |
|
I
generally don't attempt to flush out the bearings in any
way. I use a lint-free rag to wipe out as much grease
as possible, and then just re-grease with a grease gun.
I fill the "hole" with grease, and work it around
as much as I can with my fingers. When I insert the sleeve
or bolt, I catch the grease as it's pushed through. |
|
Any
good quality grease would be fine; check out
Grease
101 if you need some info on choosing a
grease. I use Mobil synthetic grease.
I
take a gob of fresh grease on my finger, and work the
grease into the bearings as thoroughly as possible.
You can't really put in too much, the shaft will push
out any excess. The one area that should be relatively
free of grease is where the seal is seated. Much grease
here will prevent the seal from settling flush and completely
.
|
|
That's
pretty much it for the swingarm service. |
|
Clean
and lube the chain, and prepare it for reinstallation.
|
|
With
the chain over the left corner of the swingarm, put
the swingarm into place and insert the mounting bolt.
I do this the same way as I remove it; seated behind
the bike with the swingarm on my knees to help hold
it in place while I insert the bolt from the side.
The
swingarm mounting bolt nut takes 98 N-m, 10
Kg-m, 72 Ft-lb of torque.
|
|
Install
the two links. The nuts require 98 N-m, 10 Kg-m,
72 Ft-lb |
|
However
you chose to deal with it, make sure the hoses are secured
back into the holder at the upper right corner of the
swingarm. |
|
Loop
the chain around the (front) engine sprocket, and reinstall
the nut, and lock washer if used. (The Sagebrush
prevailing nut doesn't require the lock washer.)
The
engine sprocket nut takes 98 N-m, 10 Kg-m, 72
Ft-lb of torque.
|
|
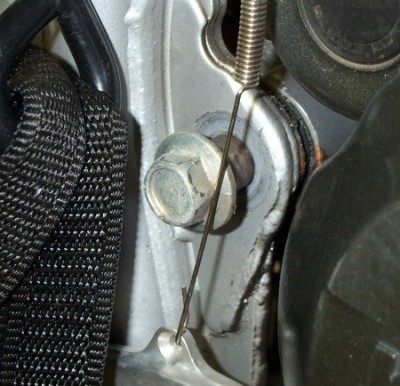
Lift
the wheel up into place, and insert the axle bolt. The
axle nut requires 93 N-m, 9.5 Kg-m, 69 Ft-lb
of torque. Be sure to install the cotter pin. I use a
hairpin, with a ziptie around the two legs to be sure
it doesn't come out. |
|
Install
the brake caliper, and line holder. The brake caliper
mount requires 25 N-m, 2.5 Kg-m, 18 ft-lb
of torque. The brake line holder should just be snug.
Both the caliper mounting bolts, and the line holder should
have a little blue Loctite applied to them. |
|
Lower
the bike down to the ground, and adjust the chain, if
necessary. Remember to check the chain "loaded."
You can have someone sit on the saddle while you adjust
the tension, which is the easiest. It's a little more
hassle because you have to go back and forth, but you
can also lay across the saddle, or sit on the saddle to
see where you are. Make sure to do this though, there
is a big difference between loaded and
unloaded chain tension. And, unless you and your gear
don't weigh anything, loaded tension is the only one that
matters. |