Home |
Community |
Forms |
Pictures |
Procedures |
- - - - - - -
- |
- - - - - - -
- |
| Mark's KLR650 Site Has Moved! *** This is old and outdated Information *** Please click the following link and change your bookmark to: ---------------------------------
|
DUAL-STAR MAGURA
HYDRAULIC CLUTCH |
The Magura
Hydraulic Clutch is available at Dual-Star |
As is the case
with all the procedures on this website, the pictures are ABOVE
the text that they go with. |
Installation
of the Magura hydraulic clutch purchased from Dual-Star was easy
and very quick. |
 |
First,
remove the clutch lever screws to release the clutch lever from
the handlebars. Be careful that the small red adjustment "star"
doesn't rub against the list switch assembly. |
 |
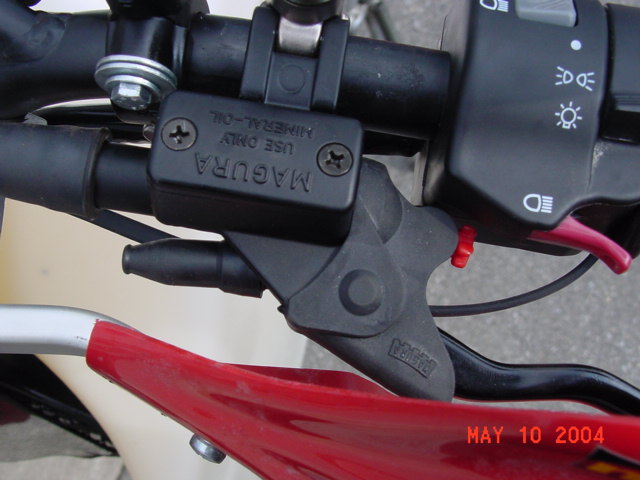
| Now, the clutch safety interlock switch. The picture above shows the safety switch contacts. Once you removed the 2 screws holding it to the stock lever, you will need to cut the copper plate on the switch. There are 3 wires: Green, Black with yellow and Blue. You do not use the green wire. You will need to attach the supplied terminals to the remaining wires and slip the supplied rubber boot over them as you attach them to the hydraulic clutch lever. In the photos, the boot is installed and also removed, and with my finger, I am pointing to its location. I did not bother to install the clutch interlock switch and removed the wiring harness completely, but unplugging it from the connector behind the instrument panel. |
| |
Next,
you must remove the clutch cable from the lever in order to pass
the cable under the steering head. |
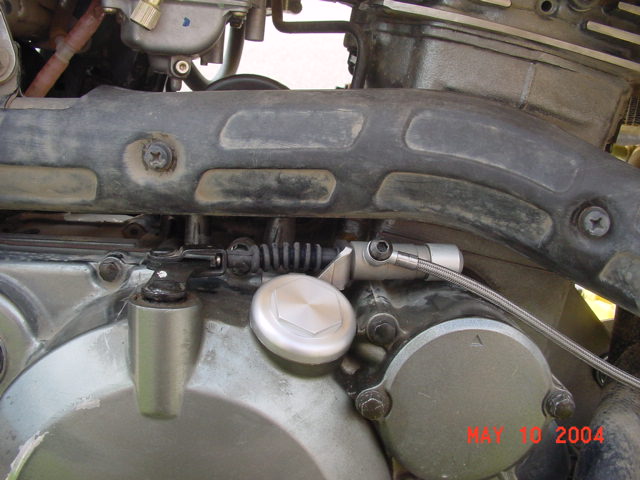 |
| The picture above shows the attachment at the clutch actuator Once the clutch cable is removed from the lever, remove the bolt holding it at on the engine case and disconnect the clutch cable from the pivot. The easiest way to do this is to pull out the clutch pivot assembly and the long "spike" out of the clutch plate hole. (It only goes back in one way, so you can't mess it up.) |
 |
The picture above shows that the routing is the same as the original clutch cable. With the hydraulic clutch assembly, pass the stainless steel braided line to the clutch "pivot" point at the engine casing. Attach the clutch cable to the "pivot" while it is removed from the engine, then insert the "spike" into the clutch plates hole (it can only go in one way). |
 |
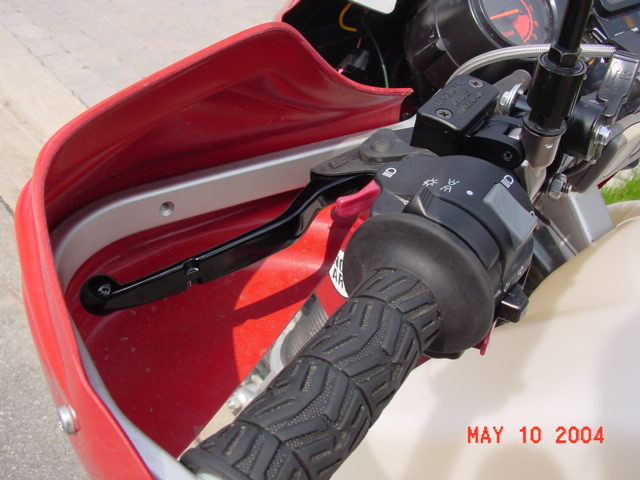 |
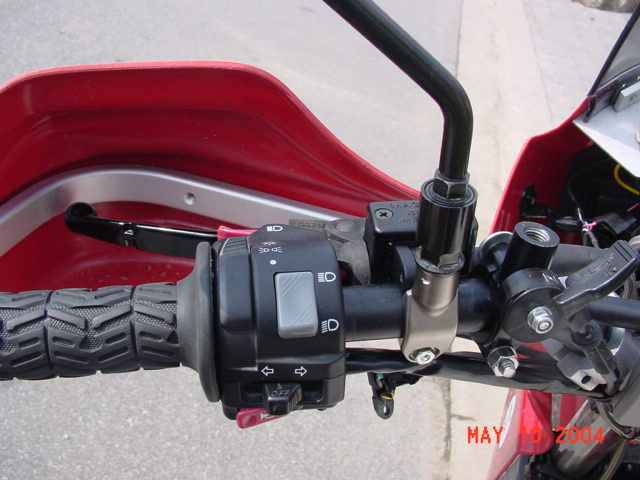
| The pictures above show the mirror attachment option, and how the choke control was mounted. Attach the clutch lever to the handlebars. You will need to place it about an inch or so away from headlights assembly switch. Test the lever by pulling it in, and make sure the little red star shaped lever adjuster clears the switch assembly without rubbing on it. The little red star shaped knob allows you to adjust the lever's distance from the handlebar |
Done!
Go for a test ride. The operation of the clutch is now effortless
and you never have to adjust the clutch cable again. To me, this
was a highly worthwhile upgrade. |
I also purchased the hydraulic clutch bleed
kit from Dual-Star. If you have any questions or comments, email
me: captive@rogers.com |